MyPhoto Help
Basic Usage
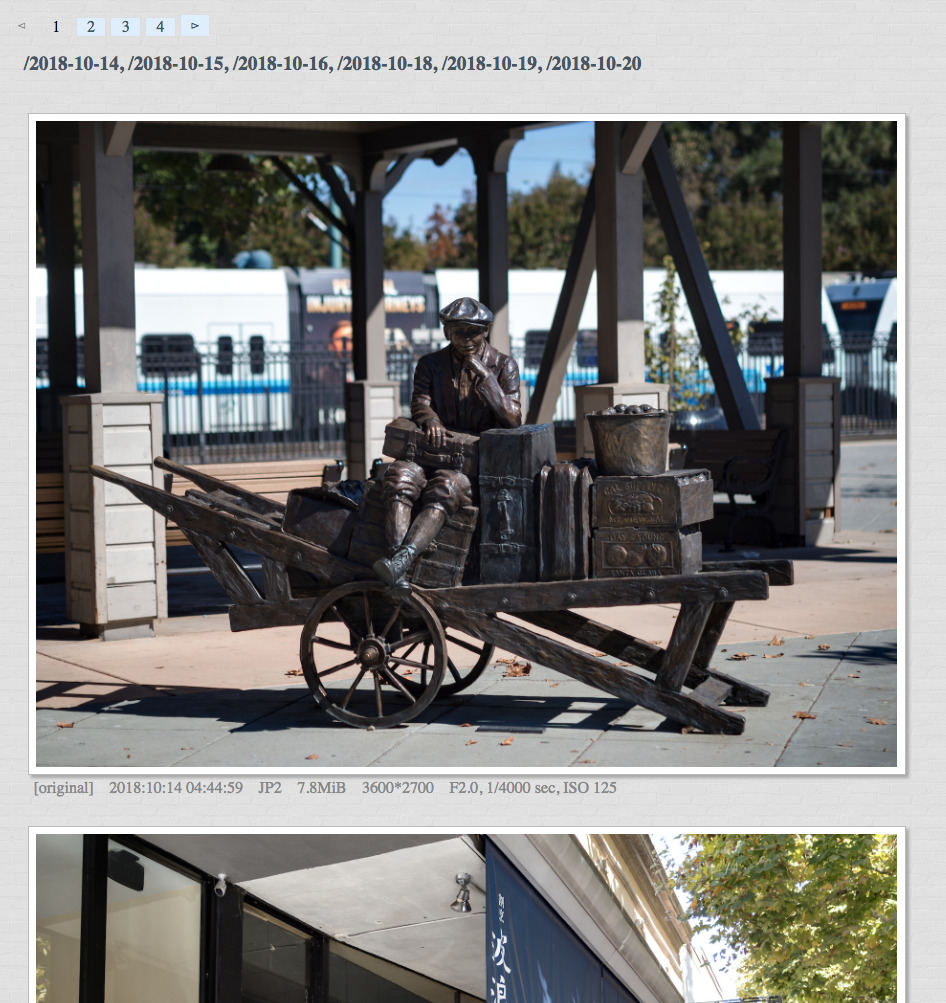
MyPhoto is a user interface to browse and manage image files. When you access the URL of MyPhoto, you see a screen like this. This view is called "list view".

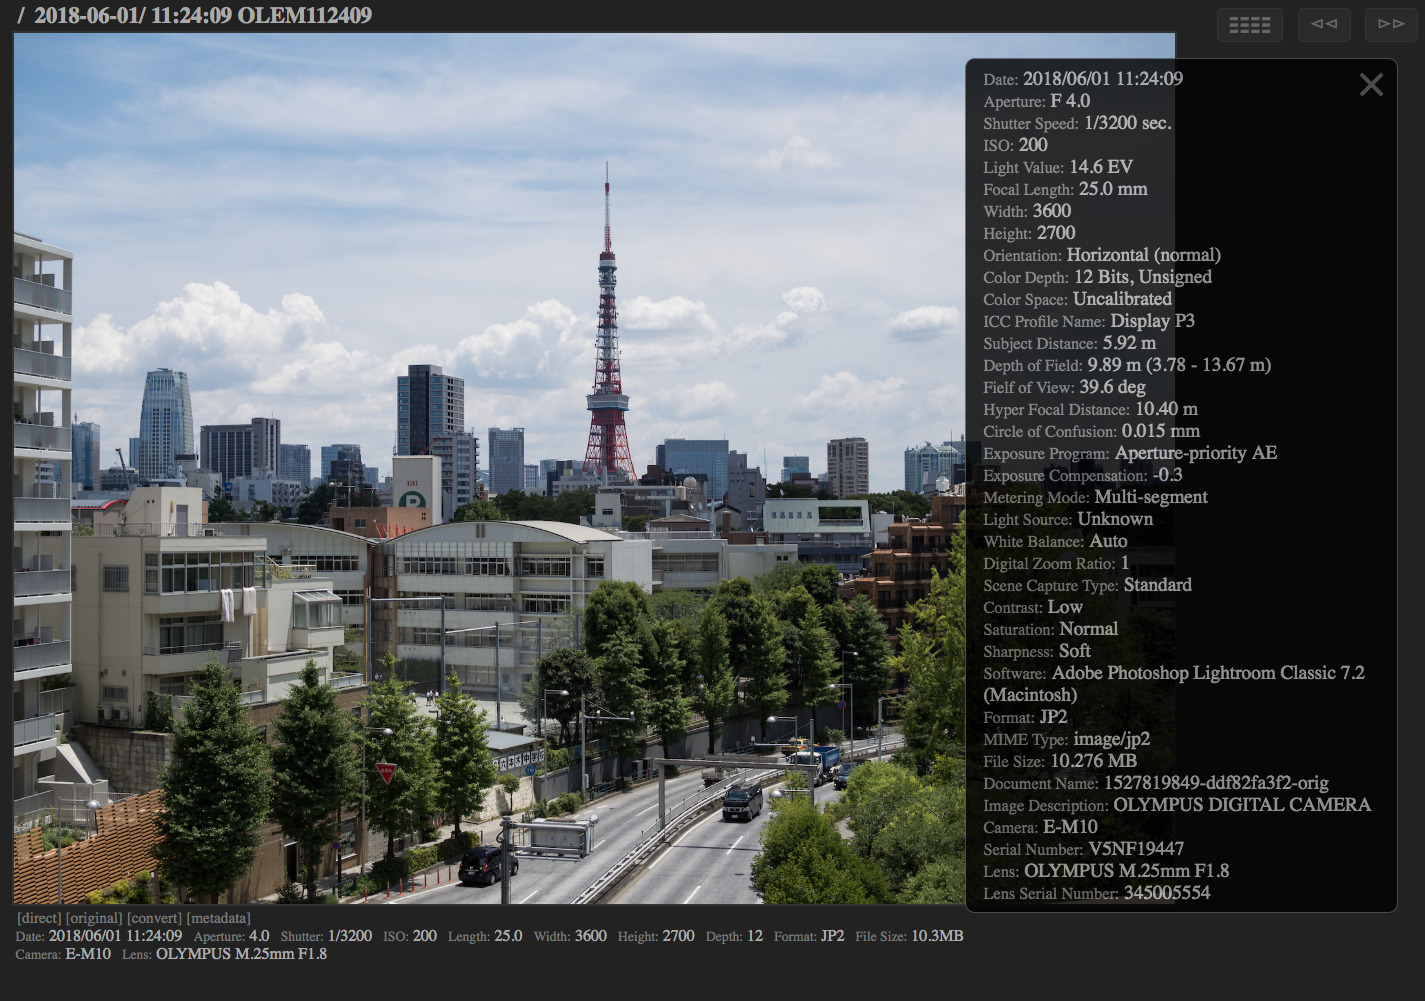
If you click a thumbnail, you see a larger image. This view is called "content view". On the top left of the screen, there is a title text like "/ 2018-07-30/ 16:22:43 P7304385", which means that the image is named "16:22:43 P7304385" under the collection named "2018-07-30" under the top collection "/". By clicking one of them, you jump to the view of the location.
Click the "/" link of the top left of the screen to go back. This site can manage various data including images and videos in a hierarchical structure. Each content data is called "record". Records are organized by their creation dates. Records of the same date are stored in a "collection". All collections of dates are stored in the root collection. So, in the list view, you see the root collection "/" containing multiple date collections containing multiple images.
On the top right of the screen, there are some icons. "☷☷" is the menu icon, whereby you can do various operations. The single arrow icons "◅" and "▻" are to jump to the previous page and the next page if the current collection has more records than it can show at once. The double arrow icons "◅◅" and "▻▻" are to jump to the previous and the next sibling of the current record/collection.
If you use a computer with a keyboard, you can use its arrow buttons to move. The left arrow key takes you to the previous page or sibling. The right arrow key takes you to the next page or sibling. The up arrow key takes you the parent collection. The down arrow key takes you the first child. If you use a smartphone or tablet, swiping left-to-right and right-to-left takes you to the previous or the next location.
You often jump to the content view of each image from the list view of the root collection, and then want to go back to the list view immediately. Remember to push the "q" key, which takes you to the previous view in your browsing history. Swiping top-down on mobile devices has the same effect.
By clicking "MyPhoto" logo on the top left or pushing the "esc" key on the keyboard takes you to the top page.
Managing Resources
You can select records and collections by clicking their icons "📁", "📷", "🎞", or "📄". Right clicking, double-finger clicking, or long tapping on each resource have the same effect. Then, via the menu icon, you can click "Remove Resources" to remove the selected resources. Removed sources are actually moved to the trash collection. You can go to the trash collection via the "Trash" link on the menu. In trash collection, you can select resources and click "Restore Resources" on the menu to restore the selected resources. If you want to delete the resources completely, do "Remove Rsources" for the resources in the trash.
Selected resources can be downloaded as a ZIP archive by choosing "Download Resources" on the menu. If you choose "(all)", all kinds of data in the album including metadata and thumbnail are contained in the archive. If you choose "(data)", only the original input data are included. If you choose "(view)", only the small JPEG image for viewing on browsers are included. However, as to video data, the original input is included in both "(data)" and "(view)".
You can upload image or video files on the server via "Upload Data" menu. You can set the date and the comment if you want. Uploaded files are registered in the album asynchronously.
Various Views
If you want to see records regardless of the date, choose "Flatten Tree" on the menu, or push "f" on the keyboard. If you want to see a few records for each date, choose "Collection Snippets" on the menu, or push "w" on the keyboard. If you want to see a list of date names only, choose "Collection Names" on the menu, or push "e" on the keyboard.
By default, collections are sorted in accending order of the date. In other words, the newest dates comes first. Thereby, you can find recent records easily. Meanwhile, in each collection, records are sorted in descending order of the time. In other words, older records come first. Thereby, you can relive each day in natural time order.
If you want to sort records in throughly accending order of the time, choose "Newest First Order Through" on the menu. If you want to sort records in throughly descending order of the time, choose "Oldest First Order Through" on the menu.
By default, top 200 records are shown on PCs and top 100 records are shown on mobile devices. If you want to see more records at once, choose "More Records" on the menu. Likewise, "Less Records" on the menu reduces the number of show records.
Again, if you are looking for a day in your memory, the collection snippet view (push "w") is useful because a few pictures are enough to remember the day. If you know the date of the day, the collection name view (push "e") is useful because you can see many candidates at a glance.
Slide Show
In the list view, clicking "⧎" of each collection shows a slide show of the collection. It is useful to see many pictures quickly.

Arrow icons "◅" and "▻" on the bottom left/right show the previous or the next records. Moreover, the left arrow key and the right arrow key of the keyboard show the previous and the next records. The up arrow key and the down arrow key take you the first and the last record. Swiping left-to-right and right-to-left on the mobile devices take you the previous and the next records.
You can select each record by clicking "🎬" on the top left of the screen or push the space key on the keyboard. Then, select box appears on the top right of the screen. You can remove or download selected records. This seamless integration of "view and delete" oprations is the most charming point of this site. Thereby, you can upload many images as you like and then keep only the best shots by checking each of them quickly.
To quit the slide show, click "×" on the top right or push the "q" or "esc" key on the keyboard.
On the list view, you can select resources and choose "Slide Show" on the menu to start a slide show for the selected records. You can choose "Slide Show" under "Current Resources" on the menu even if you don't select any resources. Then, a slide show for all resources of the current page starts.
Exhibit
You can share some images in your album with other people who don't know the password. You select images on the list view and choose "Exhibit Resources" on the menu to start an exhibit for the images. You can choose "Exhibit" under "Current Resources" on the menu even if you don't select any resources. Then, an exhibit for all resources of the current page starts.
The exhibit page is accessible by any people who know the URL which includes a unique key for the images. Therefore, you can share images by telling the exhibit URL for them. This feature is useful to show many images to your friends and relatives.
Advanced Features
On the content view, there are links below the content. "[direct]" is a direct link to the page. "[original]" is a link to the original input data. "[convert]" shows a submenu to convert the original image non-destructively. "[metadata]" shows a list of metadata such as EXIF. From the menu, you can choose "Edit Metadata" to modify the date and/or the comment attribute of the record.
On the conversion submenu, you can specify these parameters to convert the image.
- Trim Top, Trim Bottom, Trim Left, Trim Right: Do trimming by cropping each side.
- Aspect Ratio: Assure the aspect ratio by cropping either side.
- Resize: Resize the image by setting length of the longer side.
- Denoise: Apply noise reduction by blending adjacent pixels.
- Level Black: Set the black point to adjust contrast.
- Level White: Set the white point to adjust contraxt.
- Gamma: Apply gamma correction to adjust brightness.
- Contrast: Apply sigmoidal contrast correction to adjust brightness and contrast.
- Saturation: Adjust saturation in a non-linear or linear manner.
- Vignette: Apply vignetting on edges of the frame.
- Filter: Apply a color filter to get a grascale image.
- Unsharp: Apply an unsharp mask to sharpen the image.
- Profile: Convert the color profile.
- Strip Meta: Strip metadata.
- Format: Convert the data format.
Shortcuts
- esc : Go home or quit the slide show.
- q : Go to the previous view or quit the slide show.
- w : Show the collection snippet view.
- e : Show the collection name view.
- r : Jump to an arbitrary page.
- a : Enter the full screen mode.
- z : Play the video or show the original content.
- x : Enlarge the image on the screen. Clicking the image has the same effect.
- s : Start a slide show. In slide show, hide thumbnails and icons.
- d : Start an exhibit.
- c : Convert the image.
- m : Show metadata of the image.
- y : Get converted image from the original document to JPEG.
- u : Get converted image from the original document to JPEG with sharpening and contrast adjustment.
- up : Go to the parent collection.
- down : Go to the first child resource.
- left : Show the previous children or go to the previous sibling.
- right : Show the next children or go to the next sibling.
Tips
Typically, you are interested in recent photos rather than old ones. Thus, photos of recent dates are shown first by default. Click the thumbnail of each photo which you are curious about. Then, push the "q" key or swipe top-down to come back. You can do the same thing for each collection by clicking their titles. If you want to browse many photos of a date, click "🎬" of the date to see a slide show. And, push the "q" key or swipe top-down to come back.
If you search for a photo taken in the past, locate the date by going over a list of dates which is shown by clicking the "e" key or selecting "Collection Snippets" from the menu. Then, click the title of each candidate to confirm whether the desired photo exists there.
You can upload any kind of images from "Upload Data" submenu. Camera applications on mobile devices sometimes don't attach the shooting date property to image files. In that case, the image file is registered to the current date collection. If it is not desirable, set the date property manually on the uploading submenu or modify it later from "Edit metadata" submenu.
If you click the "[original]" link in the content view of an image, you access the original input data. Behaviors to the data depends on the browser. For example, whereas Safari can render JPEG 2000 data on the window, Chrome doesn't support it and merely download it. If you want to convert the image into JPEG to view it on the browser, click "[convert]" to do so or push the "u" key.